
Start Your Own Real Estate Website Business in One Day
Launch beautiful property websites for agents and sellers.
Flexible and recurring income — all from home.
A Complete Suite of Real Estate Marketing Tools
Create premium property websites with video, photo galleries, 3D tours, floor plans, maps, and more — all with a clean, elegant story-driven flow.
1.
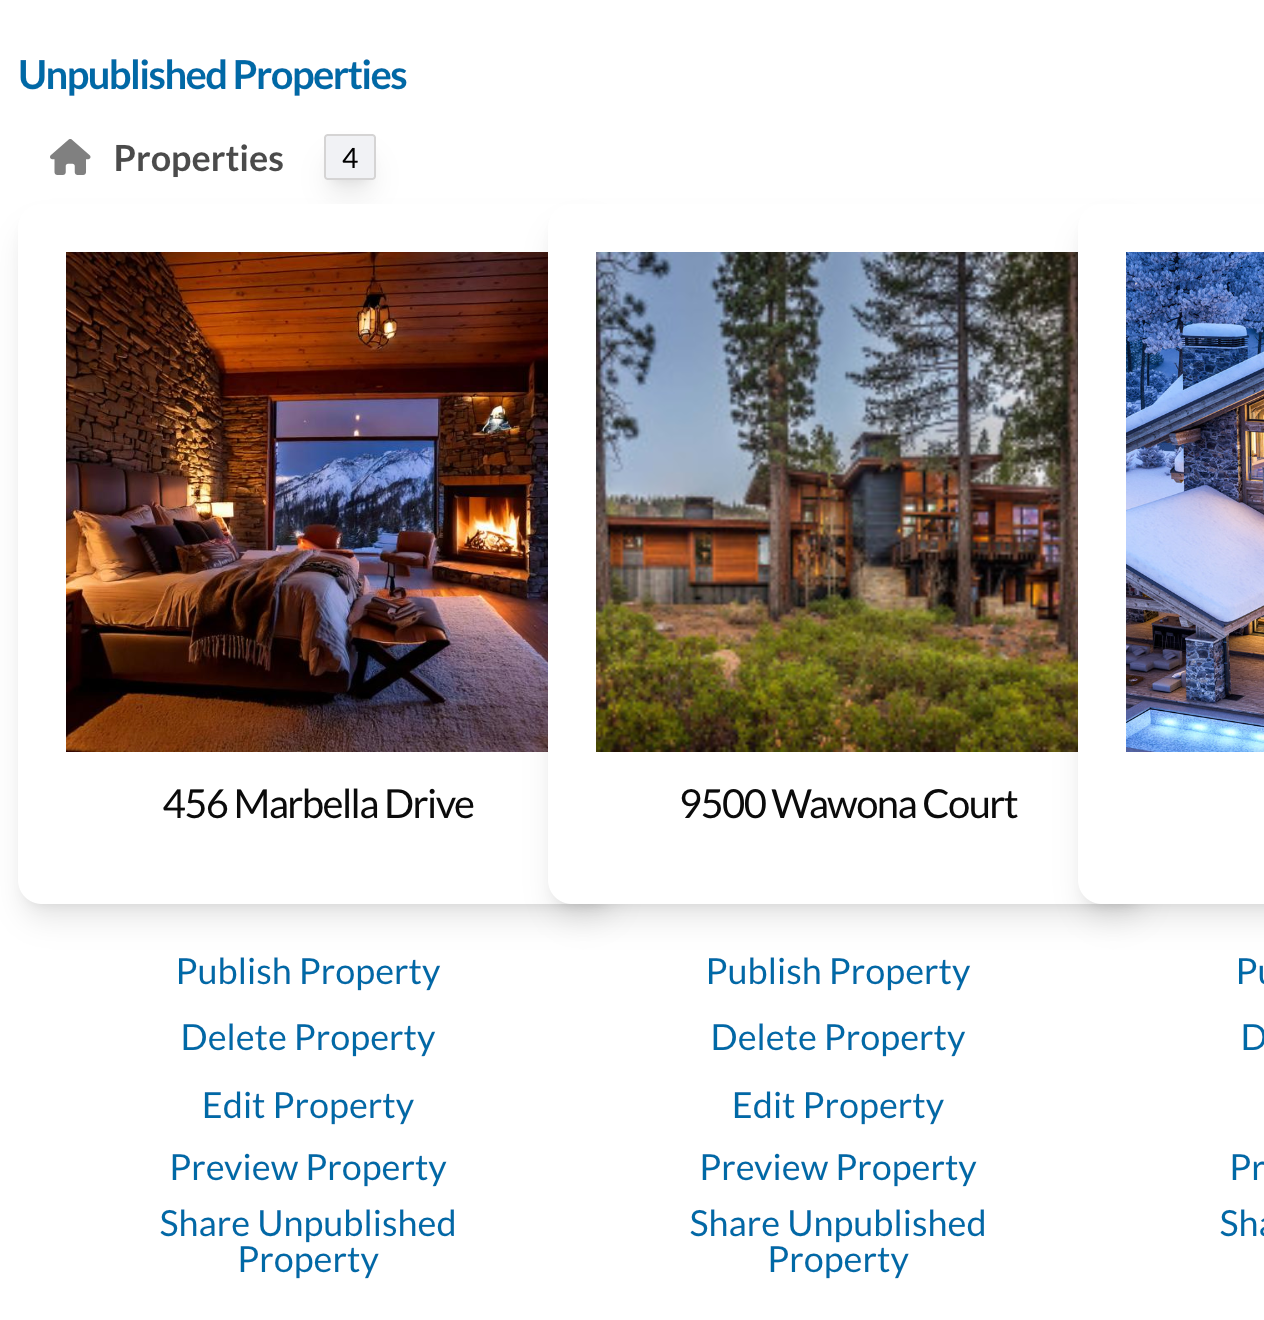
Register to create your Property Website for FREE!
Create your free account, gather your client’s photos and property details, and upload everything in minutes — no credit card required.


2.
Create & Share for Approval
Create agent and sellers property websites FAST, then send the preview link to your client for feedback and approval. Invoice them or collect payment using our form.

3.
Publish & Go Live
Publish the website when after approval. You pay our hosting fee only once the site is live. Month-to-month billing — cancel anytime.
Example Pricing of Fees to Charge Clients
| Package | What’s Included | Example Fee |
|---|---|---|
| Basic Property Website | Single story home, photos + property details only | $99 |
| Standard Property Website | Homes up to 4,000 sq. ft. with optional floorplan/video | $199 |
| Premium Property Website | Larger homes 4,000+ sq. ft. with video/3D/floorplans | $399 |
Hosting Fees
Charge your client our hosting and your fees.
No credit card required ~ Down/Upgrade or cancel anytime
Starter
$29
PER MONTH
1 Active Property Website
Enhanced
$53
PER MONTH
5 Active Property Websites
Enterprise
$130
PER MONTH
30 Active Property Websites
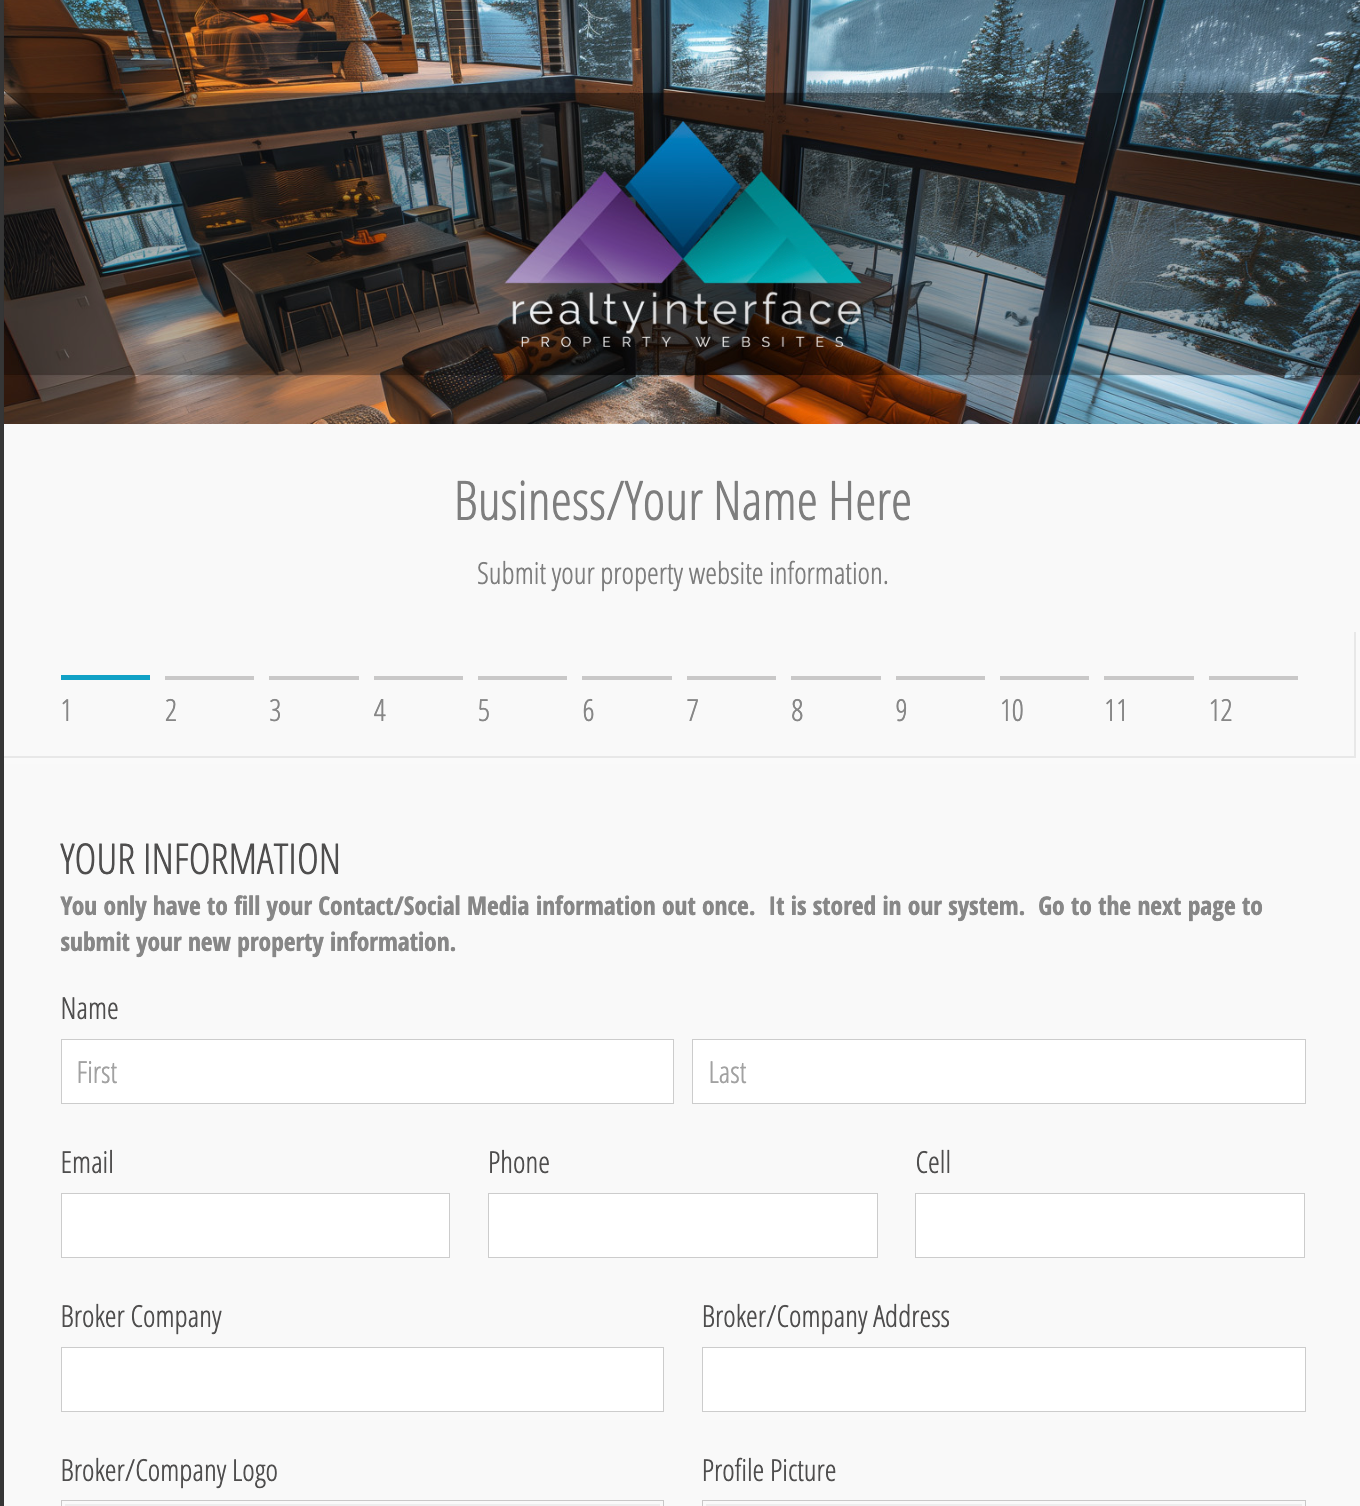
Realty Interface Property Info
Submittal Form to Customize for Your Business
$79 Annual Fee
Fully customizable to your business name.
Your clients upload images and information for you to download and create their property websites.
Your form is hosted and was created in Cognito Forms.
Customize to your own information or business.
Bill your client your way — send your own invoice or use our form with built-in payment section to connect to your payment provider (Stripe, Paypal, Applepay) to collect fees automatically. Cognito monthly fee to add the payment feature ($19 per month). Remove payment section in your form if you wish to send invoicesd.
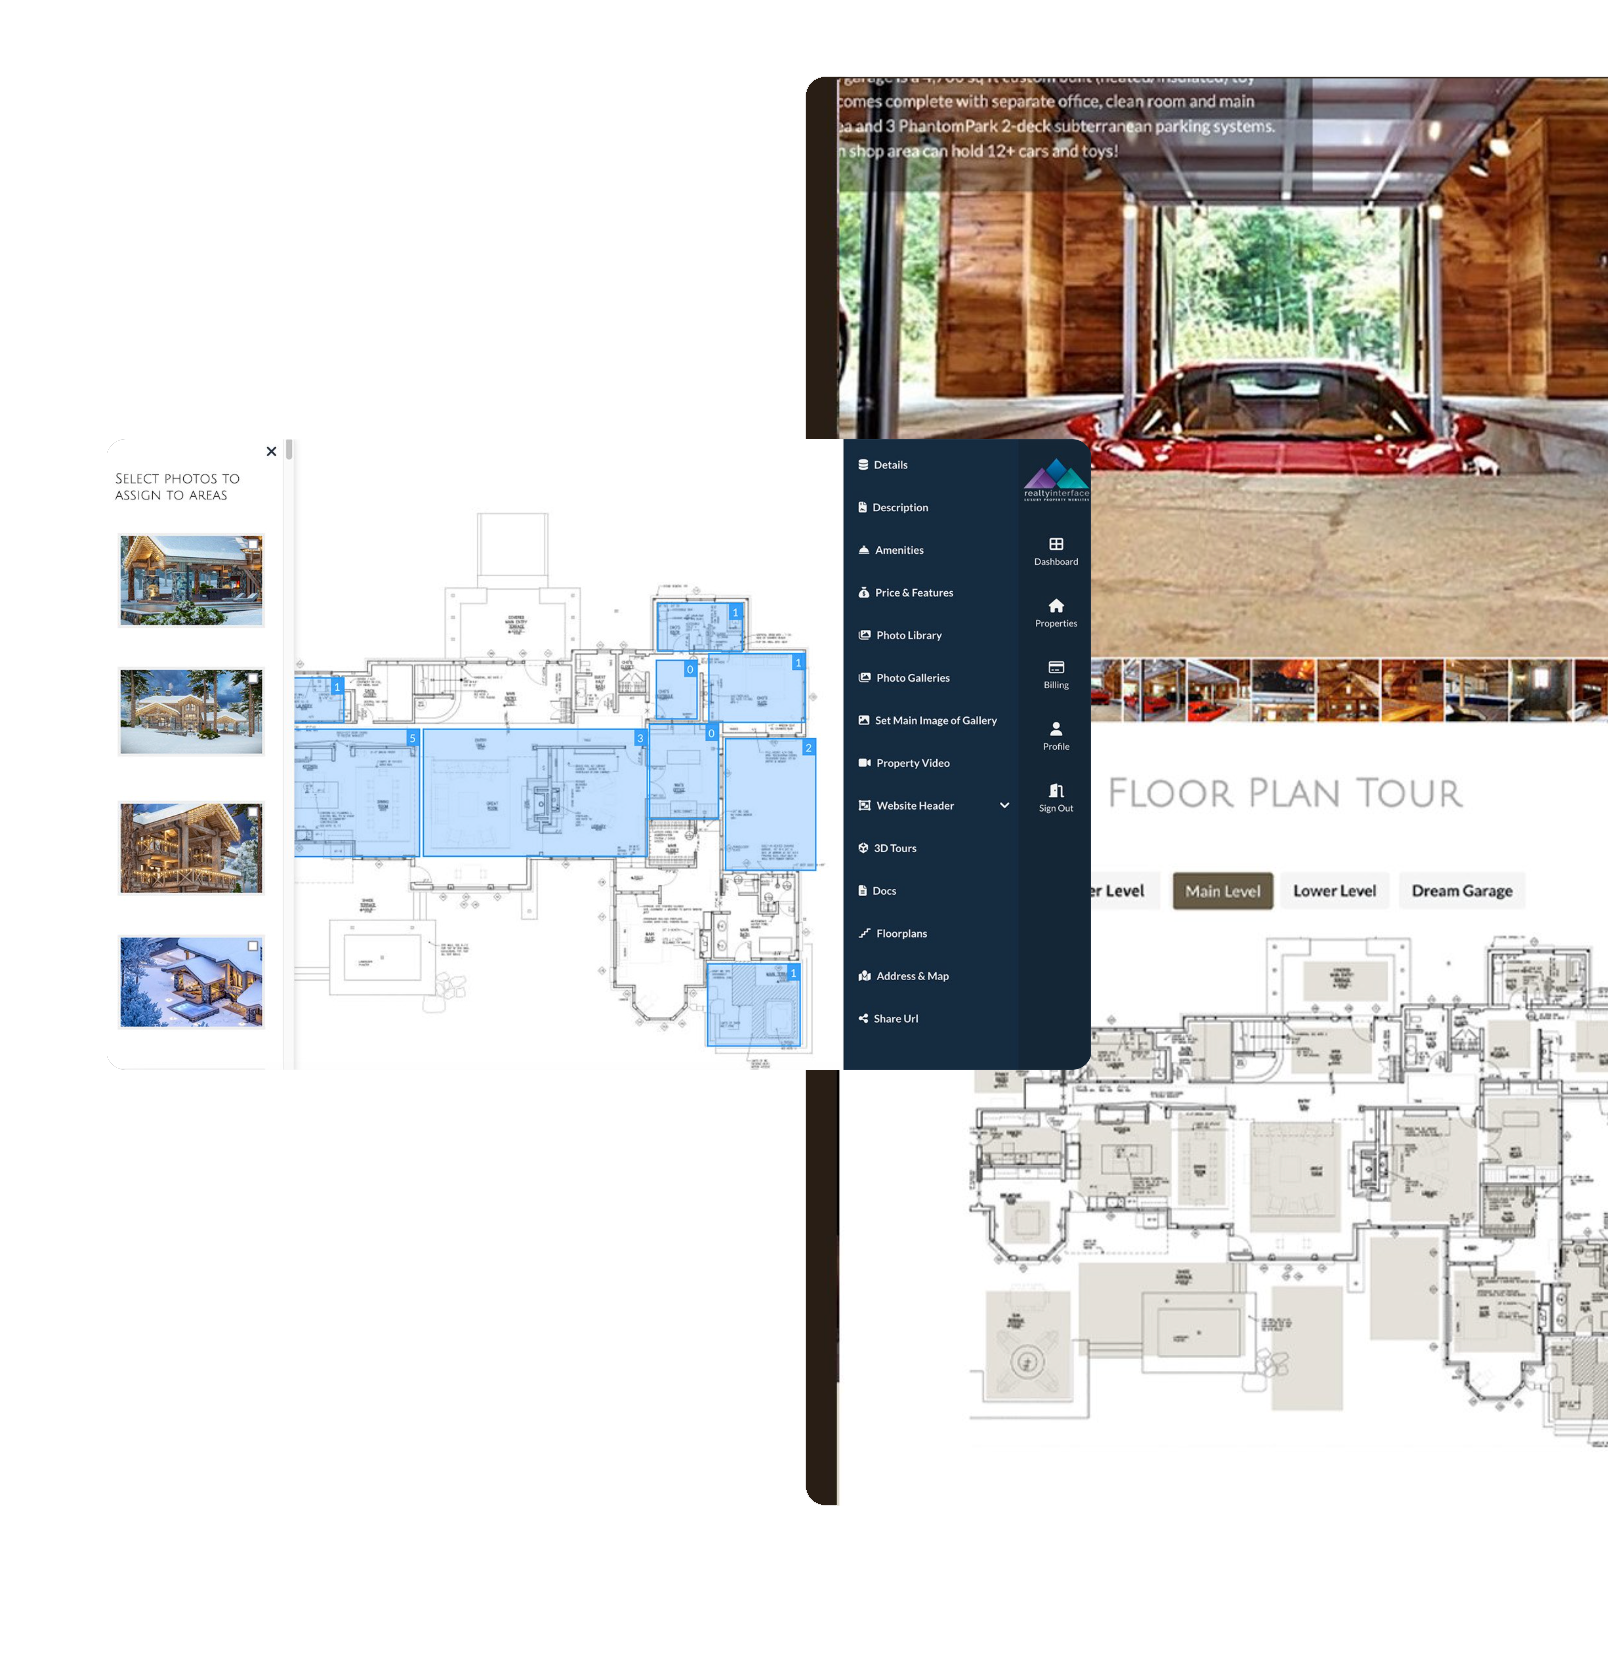
Our Step-by-Step Tutorial Guides you Every Step of the Way


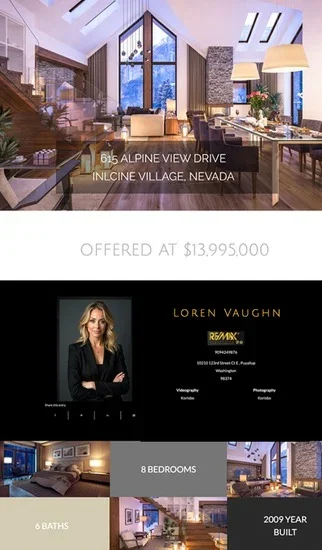
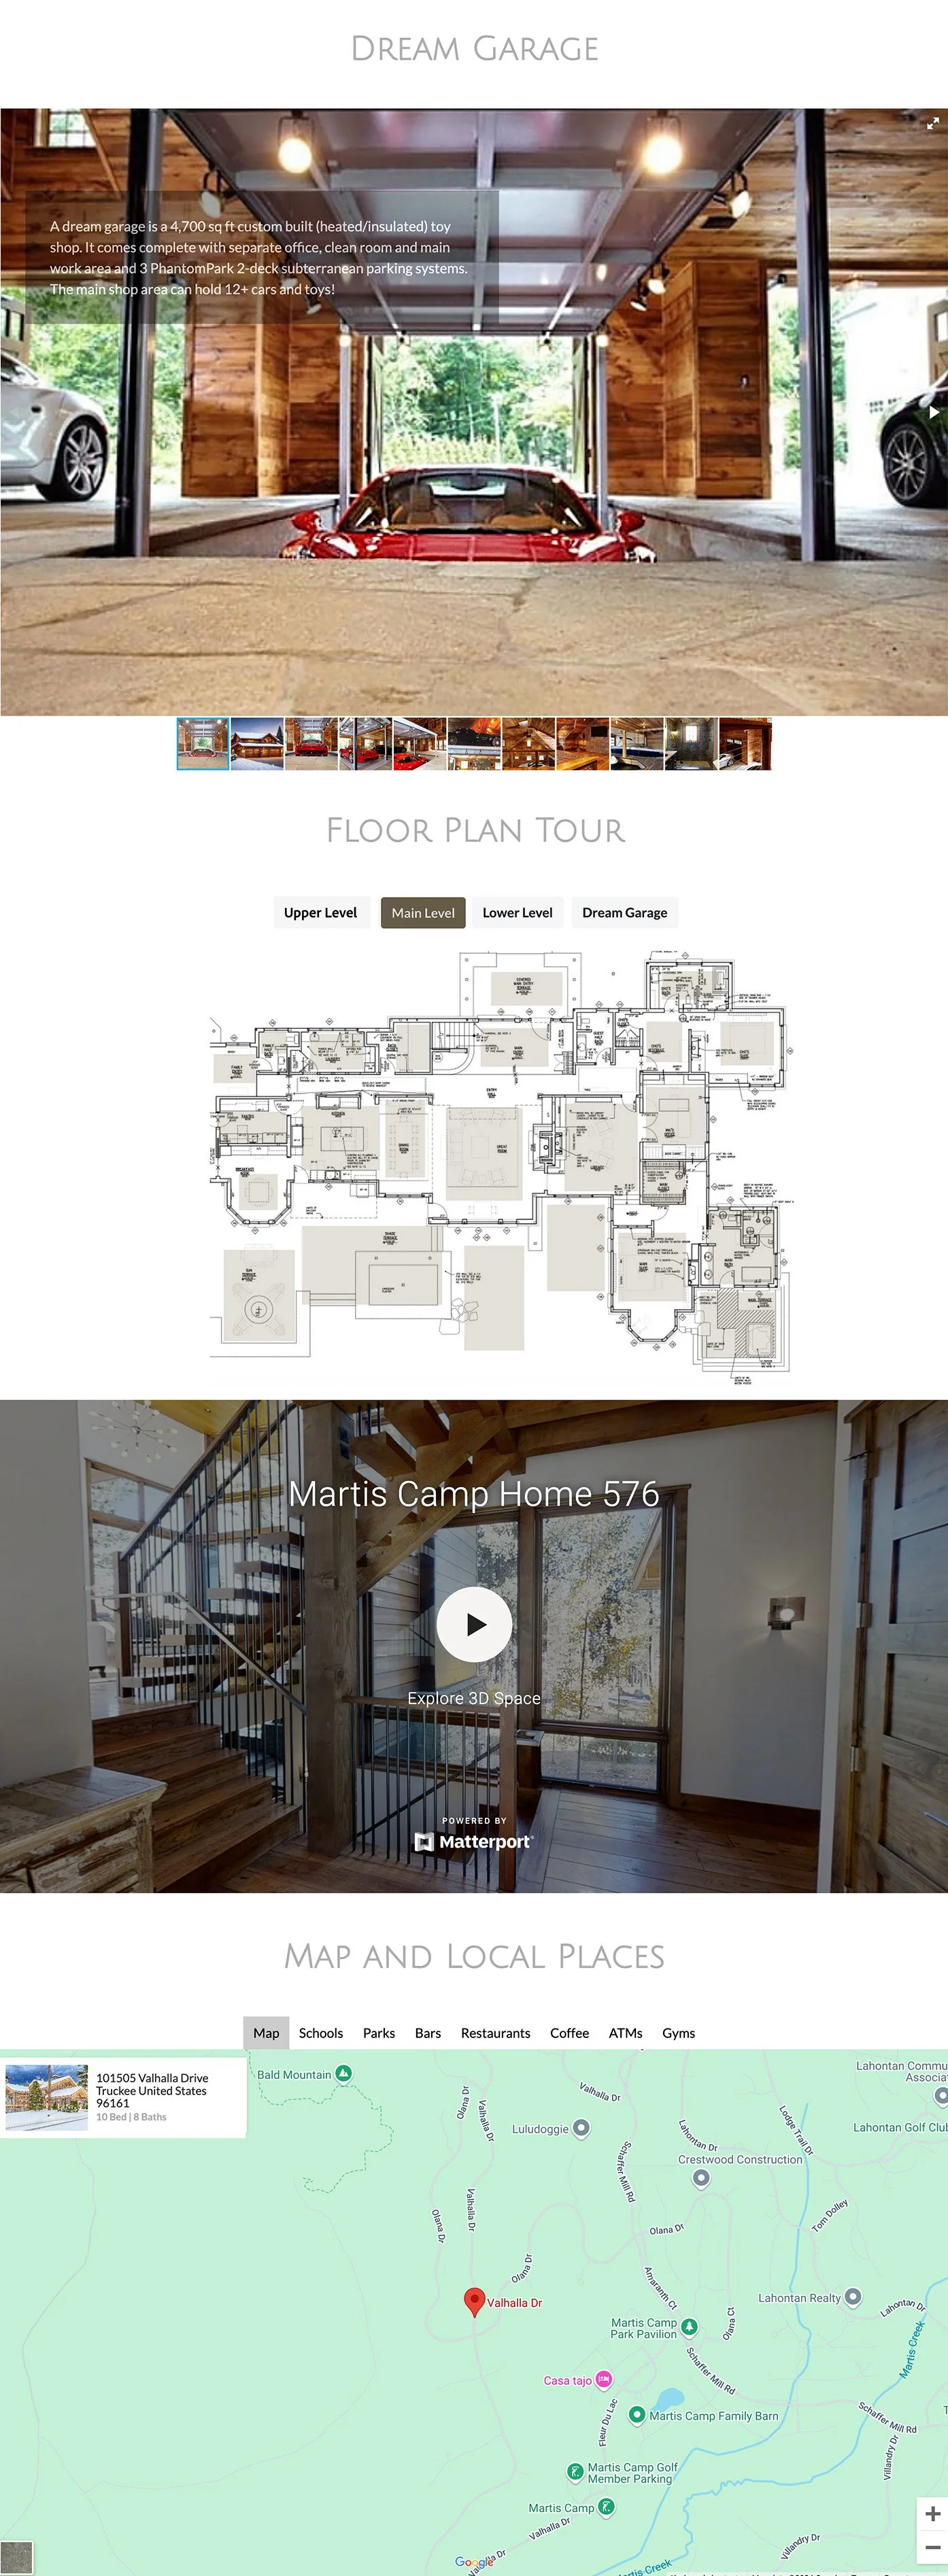
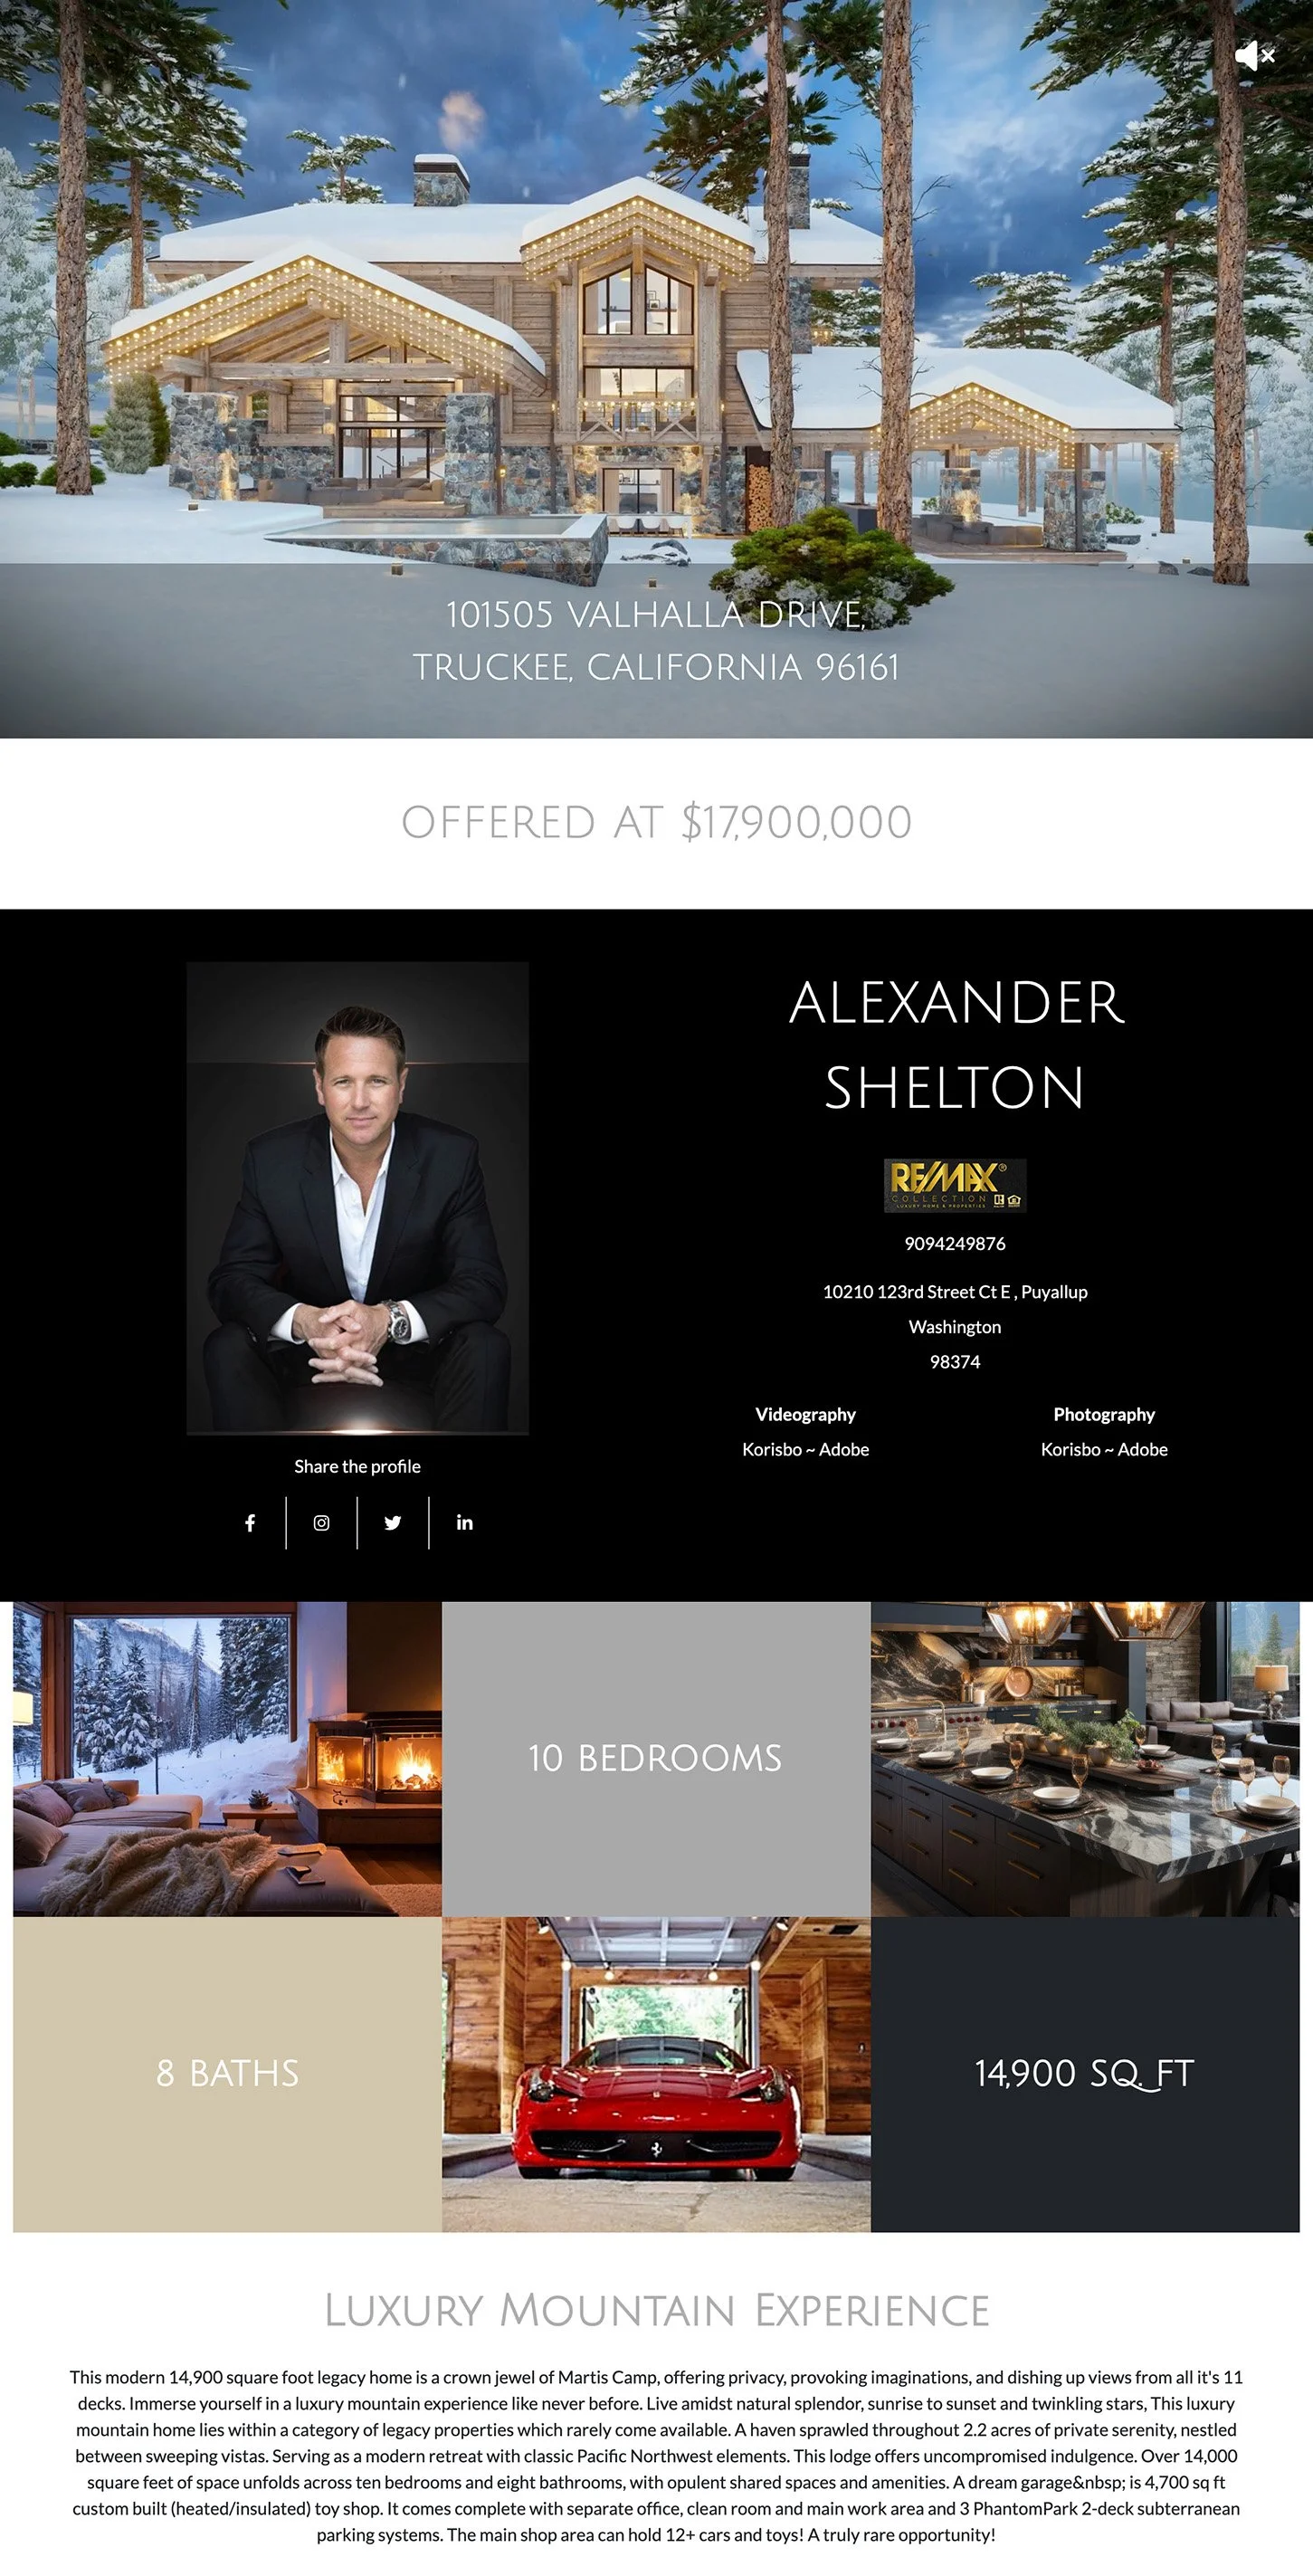
The First and Only Descriptive Photo Gallery System on the Market
Our system organizes photos into clean, titled sections like “Main Level,” “Dream Garage,” and “Chef’s Kitchen” — delivering a premium, story-driven experience.

Add Optional Floor Plans
Assign photos to rooms and create interactive floor plan tours — included in every plan.
Ready to Start?

Create your property website ~ It’s FREE
Add your name and Customize your Form